Dyeing your hair at home can be a convenient and cost-effective alternative to salon visits. However, achieving professional results while maintaining the health of your hair requires careful preparation, the right products, and proper techniques.
In this comprehensive guide, we will walk you through each step of the process to how to dye your hair at home safely and achieve stunning results.
Choosing the Right Hair Dye
Understanding Hair Dye Types
- 3-STEP BOND ENFORCING: The 3-step Bond Enforcing System creates bonds and strengthens hair, leaving your hair 5X stronger after using this hair dye kit (against combing breakage on damaged hair vs a non-conditioning shampoo)
- The #1 root touch-up* for long-lasting, natural-looking roots. Matches leading shades, even salon color* *based on units sold *Among leading retail permanent shades and pre-formulated salon color.
- Gray Coverage Hair Color With Triple Protection: No hair color cares more than Excellence Crème; With our triple protection system that seals, replenishes and conditions, plus 100 percent gray coverage even on stubborn grays.
When selecting a hair dye, it’s essential to understand the different types available:
- Permanent Hair Dye: This type of dye penetrates the hair shaft and offers long-lasting color that typically lasts until the hair grows out or is cut off. It’s ideal for those looking to cover gray hair or achieve a significant color change.
- Semi-Permanent Hair Dye: Semi-permanent dye coats the hair’s surface and gradually fades over several washes. It is less damaging than permanent dye and perfect for those who want to experiment with a new color without a long-term commitment.
- Demi-Permanent Hair Dye: Demi-permanent dye also coats the hair but lasts longer than semi-permanent dye. It usually washes out after 20-28 shampoos, providing a middle ground between permanent and semi-permanent options.
- Temporary Hair Dye: This type of dye washes out after one or two shampoos. It’s great for special occasions or trying out bold, unconventional colors.
Selecting the Right Shade
Choosing the right shade is crucial for achieving your desired look. Here are some tips:
- Consider Your Skin Tone: Warmer skin tones often look best with golden, caramel, or copper hues, while cooler skin tones can pull off ash, platinum, and burgundy shades.
- Start with a Subtle Change: If you’re dyeing your hair at home for the first time, opt for a shade close to your natural color to minimize potential mistakes.
- Use Online Tools: Many hair dye brands offer online tools to help you visualize how different shades will look on your hair.
Preparing to Dye Your Hair
Gathering Supplies
Before you start, make sure you have all the necessary supplies:
- Hair dye kit (including dye, developer, gloves, and applicator brush)
- Old towels or a cape to protect your clothing
- Petroleum jelly or a protective barrier cream
- Sectioning clips
- Wide-tooth comb
- Timer
- Plastic shower cap (optional)
Conducting a Patch Test
A patch test is essential to avoid allergic reactions. Apply a small amount of the dye mixture to a patch of skin behind your ear or on your inner elbow. Wait 24-48 hours to check for any adverse reactions such as redness, itching, or swelling. If no reaction occurs, proceed with dyeing your hair.
Preparing Your Hair
For optimal results, dye your hair when it is dry and unwashed for at least 24-48 hours. The natural oils on your scalp will help protect your skin from irritation. Detangle your hair thoroughly and divide it into manageable sections using clips.
Applying the Hair Dye
- Necessary Hair Dye Kit: 1 mixing bowl; 1 hair color brush; 1 hair dye comb-brush; 2 hairdressing clips. Great for salon hairdressing use and home personal use. Perfect and necessary accessories for DIY hair dye
- Professional Hair Dye Kit: Included 1 boxes, 1 storage bag, 1 hair color bowl, 2 hair dye brush, 1 agitator, 1 shawl, 1 pair of earmuffs, 1 pair of gloves, 4 hair clips, 4 disposable bath cap. Great for salon hairdressing use and home personal use
- Necessary Hair Dye Kit: Each set includes 3 hair dye brushes, 1 folding color mixing bowl, 4 clips, 4 ear muffs, 2 pairs of gloves, 2 shawls, 2 shower caps. This hair coloring tool set is perfect for hair salon hairdressing and home personal use. See pictures for detailed dimensions.
- 19-in-1 Hair Bleach and Dye Kit: Package Contains 1 × Hair Dye Brush, 1 × Hair Dye Comb, 1 × Hair Dye Whisk, 1 × Hair Dye Bowl, 3 × Metal Hair Clips, 2 × Disposable Caps, 2 × Capes, 4 × Ear Covers, 4 × Gloves.
How to Dye Your Hair at Home Safely – Step-by-Step Application
- Protect Your Skin: Apply petroleum jelly or a protective barrier cream along your hairline, ears, and neck to prevent staining.
- Mix the Dye: Follow the instructions provided in your hair dye kit to mix the dye and developer thoroughly.
- Section Your Hair: Using clips, section your hair into four quadrants to ensure even application.
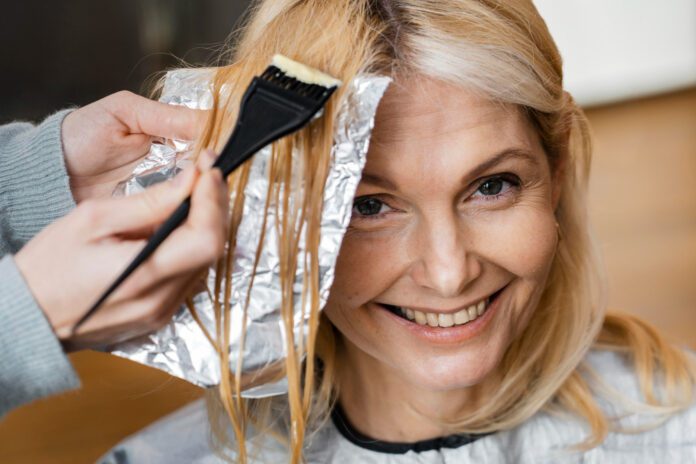
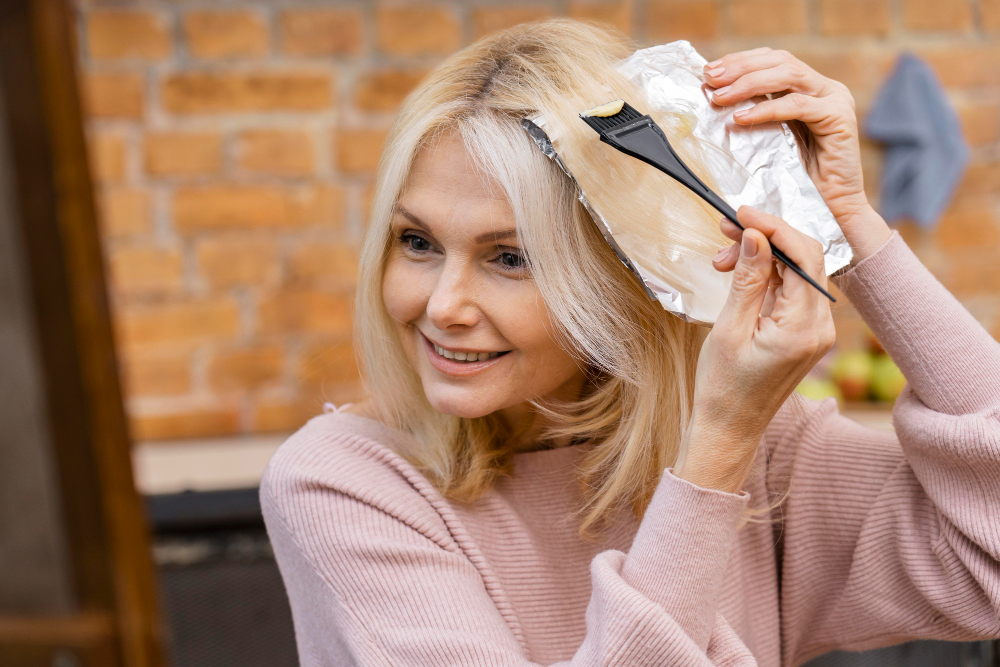
- Apply the Dye: Starting from the back sections, use the applicator brush to apply the dye to your roots first, working your way down to the ends. Make sure each strand is saturated with the dye.
- Process the Dye: Once all sections are covered, set a timer according to the instructions. Cover your hair with a plastic shower cap to enhance the dyeing process if recommended.
- Check for Even Coverage: Periodically check to ensure the dye is processing evenly. If you notice any missed spots, apply more dye as needed.
Rinsing and Conditioning
- Rinse Thoroughly: Once the processing time is complete, rinse your hair with lukewarm water until the water runs clear. Avoid using hot water as it can strip the color.
- Condition Your Hair: Most dye kits include a post-dye conditioner. Apply it generously to restore moisture and lock in the color. Leave it on for the recommended time before rinsing it out.
Aftercare Tips
Maintaining Your New Color
- Freshens hair and absorbs excess oil
- 5.71 oz Batiste Original Classic Clean Dry Shampoo, from the world’s #1 dry shampoo
- HAIR CARE BETWEEN WASHES: Dove Volume & Fullness Advanced Dry Shampoo absorbs excess oils leaving hair looking and feeling refreshed without washing and any white residue
- Use Color-Safe Products: Switch to shampoos and conditioners formulated for color-treated hair to prolong the vibrancy of your new color.
- Limit Washing: Wash your hair less frequently to prevent the color from fading. Use dry shampoo between washes if needed.
- Avoid Heat Styling: Minimize the use of heat styling tools such as blow dryers, flat irons, and curling irons, as they can damage color-treated hair. If you must use them, apply a heat protectant spray beforehand.
- Protect from Sun and Chlorine: Wear a hat or use a UV-protectant spray when spending time in the sun. If you swim in chlorinated pools, wear a swim cap or rinse your hair with fresh water immediately after swimming.
- ✅ Advanced UV Protection – TriNova’s UV Protectant Spray is a powerful blend that gives your outdoor surfaces a protective layer to counteract the damaging effects of UV rays. This spray will keep the vinyl, plastic, rubber, fiberglass, carbon fiber, or even leather surfaces in your car, boat or patio in pristine and like-new condition.
Dealing with Color Fading
As your hair grows and the color fades, you may need to touch up your roots or refresh the color. Use a root touch-up kit or a semi-permanent dye to maintain your desired shade between full applications.
Troubleshooting Common Issues
Uneven Color
If your hair color turns out uneven, don’t panic. Here are some solutions:
- Reapply Dye: For minor unevenness, you can reapply the dye to the affected areas.
- Visit a Professional: For significant color mishaps, it may be best to consult a professional colorist to correct the issue.
Color Too Dark or Light
If the color is too dark, try washing your hair with a clarifying shampoo to lighten it slightly. If it’s too light, you can reapply the dye for a darker shade or consider using a toner to adjust the color.
- Deeply cleanses and removes dulling buildup
- Leaves hair squeaky clean, shiny and full of body
Allergic Reactions or Irritation
If you experience itching, redness, or swelling during or after dyeing your hair, rinse the dye out immediately and consult a healthcare professional. Always perform a patch test before dyeing your hair to minimize the risk of allergic reactions.
Conclusion
Dyeing your hair at home can be a gratifying and delightful experience when done correctly. By following these detailed steps and tips, you can achieve beautiful, salon-quality results while ensuring the safety and health of your hair.
Remember to take your time, follow the instructions carefully, and prioritize aftercare to maintain your vibrant new look.

