As an Amazon Associate, BeautyLara earns from qualifying purchases.
A makeup sponge can give foundation a seamless, skin-like finish, but only if you use it the right way. Used dry, it streaks; used too wet, it dilutes coverage; dragged across the skin, it leaves patches. This guide explains the best way to use a makeup sponge, which sponges are worth buying and how to keep yours clean.
Quick Comparison
| Sponge | Best for |
|---|---|
| Beautyblender Original | Classic, bouncy blending |
| Real Techniques Miracle Complexion Sponge | Best value |
| EcoTools Makeup Sponge Duo | Eco-conscious shoppers |
| L’Oréal Paris Infallible Blend Artist Sponge | Long-wear foundation users |
| Juno & Co. Microfiber Velvet Sponge | Less product absorption |
The Best Way to Use a Makeup Sponge
- Dampen it fully. Run the sponge under water until it expands, then squeeze out all the excess. It should feel damp, not wet.
- Apply product to your hand or the back of the sponge. Not straight onto the sponge’s tip, which soaks it up.
- Bounce, don’t drag. Use quick stippling or “bouncing” motions to press foundation into the skin.
- Work from the centre outward. Build coverage where you need it and blend toward the hairline and jaw.
- Use the tip for detail. Around the nose, under the eyes and over blemishes.
- Use the flat side for setting. Press loose powder under the eyes or along contour lines.
Damp vs Dry: When to Use Each
| Damp sponge | Dry sponge | |
|---|---|---|
| Finish | Natural, skin-like | Fuller, more matte |
| Coverage | Sheerer, buildable | Higher |
| Best with | Liquid and cream foundation, concealer | Powder, some full-coverage looks |
| Risk | Too wet dilutes product | Can streak liquid formulas |
Using a Sponge for Different Products
Foundation
Bounce in thin layers. If a foundation looks heavy or cakey, a damp sponge pressed over the top can melt it into the skin. Our guide on how to fix cakey foundation has more tips.
Concealer
Dot concealer on, then use the pointed tip to press it in.
Cream Blush and Contour
Tap cream products with a clean part of the sponge to soften the edges.
Powder
Press powder onto areas that crease using the flat side.
Best Makeup Sponges to Buy
Beautyblender Original
Best for: Classic, bouncy blending
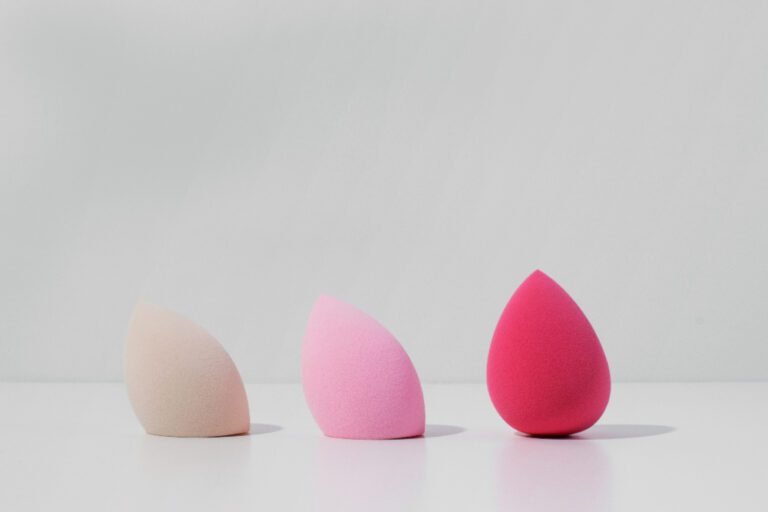
The original teardrop sponge that made damp blending popular. The pointed tip reaches around the nose and under the eyes; the round base covers cheeks.
Pros
- Soft and bouncy when damp
- Versatile shape
- Widely recommended
Cons
- Expensive for a sponge
- Needs replacing regularly
Real Techniques Miracle Complexion Sponge
Best for: Best value
A popular lower-cost alternative with a flat edge for contouring and a rounded side for blending.
Pros
- Affordable
- Flat side for contour and setting
- Easy to find
Cons
- Firmer than Beautyblender
- Can stain quickly
EcoTools Makeup Sponge Duo
Best for: Eco-conscious shoppers
A two-pack from a brand that focuses on more sustainable materials and packaging.
Pros
- Two sponges per pack
- Brand focuses on sustainability
- Budget friendly
Cons
- Firmer texture
- Less bounce than premium sponges
L’Oréal Paris Infallible Blend Artist Sponge
Best for: Long-wear foundation users
Designed to pair with L’Oréal’s Infallible foundations, with a shape that suits all-over blending.
Pros
- Good for full-coverage foundation
- Comfortable shape
- Drugstore price
Cons
- Availability varies
- Not as soft as some
Juno & Co. Microfiber Velvet Sponge
Best for: Less product absorption
A sponge with a microfiber velvet surface designed to absorb less product, so less foundation is wasted.
Pros
- Absorbs less product
- Smooth finish
- Good for liquid and cream
Cons
- Different feel than classic sponges
- Must be cleaned carefully
Buying several at once? Our guide to the best makeup sponge sets compares multi-packs.
How to Clean and Replace Your Sponge
- Wash after each use if you can, or at least a few times a week, with a gentle soap or sponge cleanser.
- Squeeze under running water until it runs clear, then air-dry somewhere ventilated.
- Never store a damp sponge in a closed container.
- Replace it roughly every one to three months, or sooner if it tears or smells.
Frequently Asked Questions
Should I use a makeup sponge wet or dry?
Damp for a natural finish with liquid and cream products; dry if you want fuller coverage or are using powder.
Why does my sponge leave streaks?
It is usually too dry or you are dragging it. Dampen it properly and bounce instead of wiping.
Is a sponge better than a brush?
Sponges give a softer, more skin-like finish; brushes are quicker and give more coverage. Many people use both.
How often should I wash my makeup sponge?
Ideally after each use, because damp sponges can hold bacteria.
Does a sponge waste foundation?
Classic sponges absorb some product, especially when dry. Dampening helps; microfiber-covered sponges absorb less.
Conclusion
The best way to use a makeup sponge is damp, bouncing and in thin layers. Choose a sponge that suits your budget, keep it clean and replace it often. Get those basics right and you will get a smoother finish from almost any foundation.