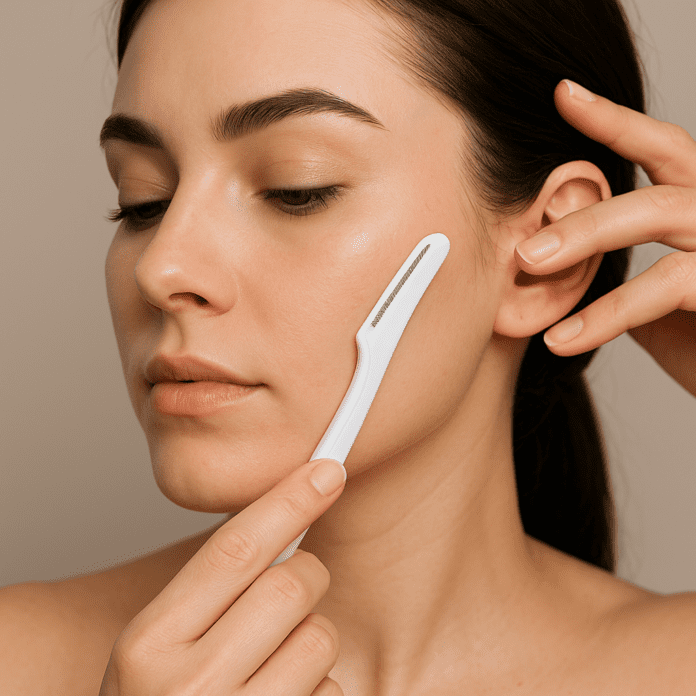
What Is Dermaplaning?
Dermaplaning is a non-invasive skincare technique that exfoliates your skin by gently scraping away dead cells and fine hair (peach fuzz) using a sterile blade. It leaves your skin ultra-smooth, radiant, and better able to absorb skincare products.
The Science Behind It
Dermaplaning works by physically removing the stratum corneum — the outermost layer of dead skin — allowing new, healthy cells to surface. It also eliminates the fine vellus hairs that can trap oil and dirt.
Benefits of Dermaplaning for Skin Health
- Instantly smoother texture
- Brighter, more even tone
- Improved makeup application
- Enhanced product absorption
- Gentle exfoliation without harsh acids
How Dermaplaning Works: A Simple Explanation
How It Removes Dead Skin and Peach Fuzz
The blade is held at a 45-degree angle and glided lightly across the skin, removing both dead skin buildup and fine facial hair. It’s similar to shaving but more refined and precise.
Difference Between Dermaplaning and Shaving
While both use blades, dermaplaning is designed to exfoliate, not just remove hair. Razors for dermaplaning are finer and angled, ensuring smoother, safer results.
Is Dermaplaning Safe to Do at Home?
Who Can (and Can’t) Try It
Dermaplaning is generally safe for most skin types — especially those with dull, dry, or uneven skin tone.
Avoid it if you have:
- Active acne or open wounds
- Severe rosacea or eczema
- Recent chemical peels or retinol use
Precautions and Safety Tips
- Always use a clean, sanitized razor
- Avoid active ingredients (like acids or retinol) for 2–3 days before
- Never share blades or reuse dull ones
What You’ll Need for At-Home Dermaplaning
The Best Tools for Beginners
- Tinkle Facial Razor – Budget-friendly and beginner-safe
- Stainless Steel Dermaplaning Tool (Dermaflash or Schick Hydro Silk) – For precision and long-term use
- LED Lighted Dermaplaning Device – Ideal for better visibility
Must-Have Skincare Products Before and After
- Gentle cleanser (CeraVe or La Roche-Posay)
- Alcohol-free toner
- Hydrating serum (Hyaluronic acid or aloe vera)
- Moisturizer
- Sunscreen (SPF 30+)
Step-by-Step: How to Dermaplane at Home Safely
Step 1: Prep and Cleanse Your Skin
Wash your face with a gentle cleanser and pat dry. Your skin must be completely clean — no makeup, oil, or residue.
Step 2: Hold the Razor at the Right Angle
Hold your blade at a 45-degree angle and pull the skin taut with your other hand.
Step 3: Use Gentle, Short Strokes
Move the razor downward in short, controlled strokes — never drag or push hard. Focus on cheeks, forehead, and jawline, avoiding sensitive areas like eyelids and lips.
Step 4: Moisturize and Soothe Afterward
After dermaplaning, apply a hydrating serum (like hyaluronic acid) followed by a gentle moisturizer. Avoid harsh actives for at least 24 hours.
Aftercare: How to Treat Your Skin Post-Dermaplaning
What to Apply After the Procedure
Use calming, hydrating ingredients:
- Aloe vera gel
- Ceramide-based moisturizer
- Hyaluronic acid serum
What to Avoid for 24–48 Hours
- Makeup or heavy foundation
- Exfoliating acids (AHA/BHA)
- Retinol or Vitamin C serums
- Direct sunlight (use SPF!)
Common Mistakes Beginners Make (and How to Avoid Them)
❌ Using the Wrong Razor Type
Never use body razors or dull blades. Always choose razors made for facial dermaplaning.
❌ Applying Too Much Pressure
Gentle pressure is key — pressing too hard can cause micro-cuts or irritation.
❌ Skipping Sunscreen Afterward
Your skin will be more photosensitive. Always apply broad-spectrum SPF 30 or higher.
Best Dermaplaning Tools for Beginners (2025 Update)
Affordable Starter Options
- Tinkle Face Razors (3-Pack) – Great for first-timers
- Flamingo Dermaplane Tool – Sleek design with safety features
Professional-Grade Tools for Home Use
- Dermaflash Luxe+ – Spa-quality results at home
- Stainless Steel Dermaplane Pro – Long-lasting and precise
Dermaplaning Benefits: What to Expect After a Few Sessions
Instant Glow and Makeup Application Benefits
After just one session, your skin will feel buttery soft, and your foundation will glide on seamlessly — no more clinging to dry patches.
Long-Term Texture and Tone Improvements
Over time, regular dermaplaning (once every 3–4 weeks) promotes:
- Improved cell turnover
- Fewer breakouts
- Brighter, smoother complexion
FAQs About Dermaplaning at Home
1. Will my facial hair grow back thicker?
No! This is a myth. Hair grows back at the same thickness and color.
2. How often should I dermaplane?
Every 3–4 weeks is ideal. Overdoing it can cause sensitivity.
3. Can I use dermaplaning on acne-prone skin?
Avoid active acne areas to prevent irritation and bacteria spread.
4. Can I do dermaplaning before makeup?
Yes — in fact, it creates a flawless base. Just wait a few hours after dermaplaning.
5. What’s the best moisturizer after dermaplaning?
Look for fragrance-free, soothing formulas with ceramides or aloe.
6. Can men dermaplane too?
Absolutely! It helps with ingrown hairs and smoother shaving.
Conclusion: A Simple, Safe Way to Achieve Glowing Skin at Home
Dermaplaning at home is one of the easiest and most effective ways to achieve smooth, radiant skin — no salon visit required.
By following these beginner-friendly steps, using clean tools, and practicing good aftercare, you’ll notice visible improvement in your skin’s texture, glow, and confidence within weeks. 🌸
Your skin deserves gentle exfoliation — and dermaplaning gives it exactly that.
🔗 External Link: Learn more about safe dermaplaning practices from the American Academy of Dermatology


